
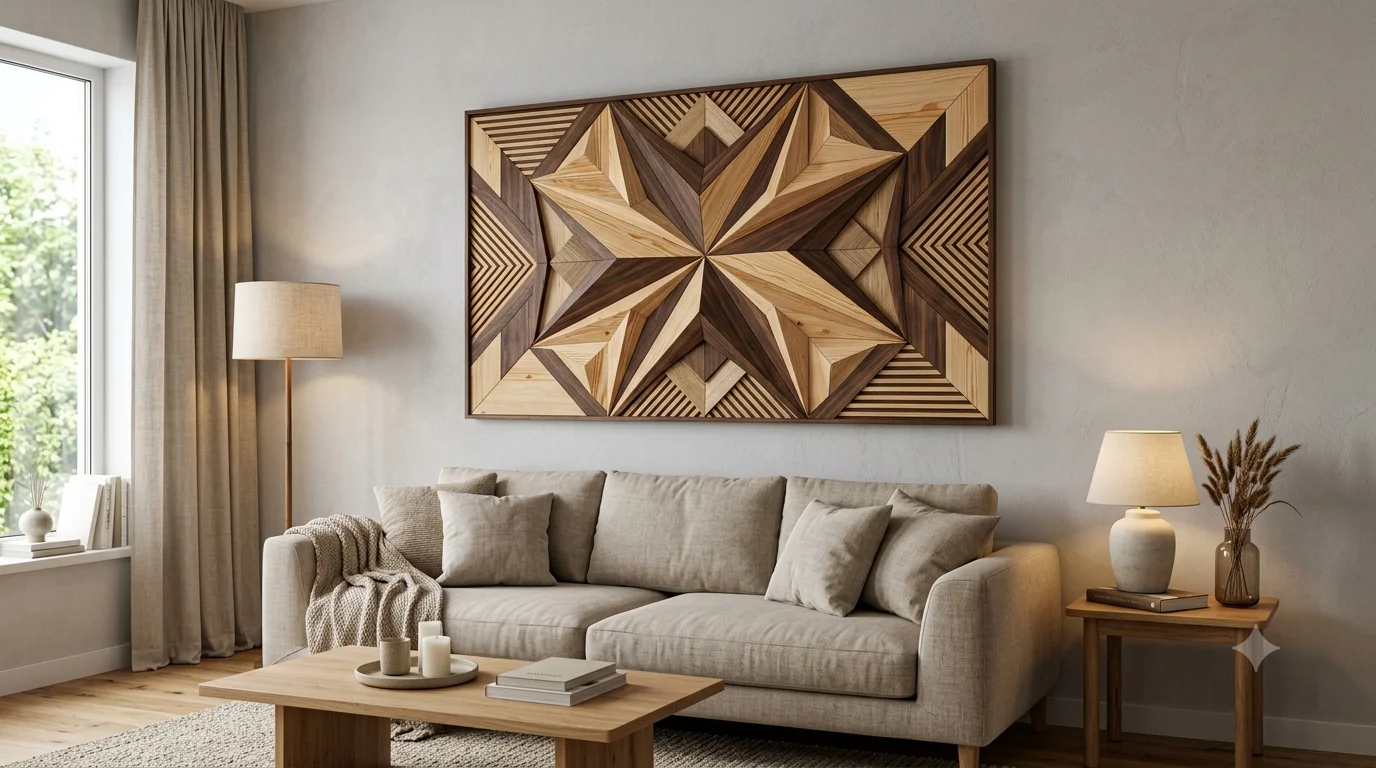
Blank walls can make even a well-furnished room feel unfinished. While canvas prints and framed posters are easy solutions, nothing brings warmth, depth, and organic texture into a living space quite like custom wood wall art.
Whether you are a beginner looking to repurpose offcut lumber from your workshop or an experienced maker crafting a focal piece for a living room, working with natural timber gives you endless design freedom. From clean geometric mosaics to rich 3D acoustic panels, wooden wall decor bridges the gap between traditional craft and modern interior design.
This guide explores 15 actionable wood wall art ideas, details the best materials and tools for the job, and provides step-by-step woodworking tips to help you build, finish, and mount your project securely.
Key Wood Wall Art Styles at a Glance
| Style | Best Wood Choice | Skill Level | Key Tools Needed | Visual Impact |
|---|---|---|---|---|
| Geometric Mosaic | 1×2 Pine / Cedar Slats | Beginner to Intermediate | Miter Saw, Brad Nailer | High modern contrast |
| 3D Layered Block | Hardwood Scraps (Oak/Walnut) | Beginner | Table Saw or Miter Saw | Tactile depth & sound dampening |
| Rustic Reclaimed | Pallet Wood / Barn Lumber | Beginner | Handsaw / Circular Saw, Sander | Rugged, vintage character |
| Live-Edge Accent | Slab Offcuts (Walnut / Maple) | Intermediate | Router, Orbital Sander | Organic, high-end luxury |
| Fretwork / Lattice | Birch Plywood | Intermediate to Advanced | Scroll Saw / Jigsaw | Delicate, intricate shadow play |
Modern Geometric & Mosaic Wood Wall Art Ideas
Geometric designs are among the most popular DIY wood projects because they rely on predictable angular cuts while offering endless design variations.
1. The Classic Herringbone Accent Panel
The herringbone pattern relies on interlocking rectangular slats angled at 45 degrees. By mixing different wood stains such as natural pine, dark walnut, and weathered grey you create dynamic directional lines that draw the eye across the room.
2. Angular Geometric Mountain Silhouettes
By layering angled wood slats of varying lengths, you can form minimalist mountain peaks or horizon lines. Using a dark-painted plywood base board beneath lighter wood slats makes the silhouette pop with sharp, high-contrast shadow lines.
3. Hexagon & Honeycomb Wall Blocks
Individual hexagonal wooden tiles can be grouped together or spaced apart across a wall. You can cut these from standard 1×4 pine boards using a miter saw set precisely to 30-degree angles. Staggering different thicknesses (e.g., 1/2-inch, 3/4-inch, and 1-inch) creates a honeycomb texture with real physical depth.
3D Textured & Sculptural Wood Art Ideas
If flat artwork feels too passive, tactile three-dimensional wood sculptures create dynamic light and shadow effects as daylight shifts across the room.
4. Dimensional End-Grain Pixel Art

End-grain wood blocks absorb stain differently than face grain, revealing rich, deep rings. By cutting square posts into short blocks of varying lengths and gluing them vertically onto a sturdy backing panel, you assemble a textured pixel grid that acts as both visual art and a acoustic sound diffuser.
5. Curved Wave & Parametric Slat Panels
By ripping thin strips of hardwood or flexible plywood, you can secure curved timber ribbons onto a framed backing. The natural flex of thin timber creates smooth, wave-like contours reminiscent of flowing water or wind-swept sand dunes.
6. Layered Topographic Map Sculpture
Stacked laser-cut or scroll-sawed plywood layers can recreate real or imaginary elevation maps. Sanding each step smoothly and applying progressively darker stains to deeper elevation layers yields a sophisticated, tactile representation of landforms.
Rustic & Reclaimed Wood Art Ideas
Reclaimed lumber carries built-in history, displaying nail holes, saw marks, and natural weathering that brand-new store-bought lumber simply cannot match.
7. Upcycled Pallet Board Signboard
Distressed pallet boards feature varied textures and natural patina. Joining dry pallet slats edge-to-edge on a thin backing board creates a sturdy canvas suitable for painted quotes, stenciled motifs, or scorched wood art. Scrap Wood Workshop Projects
8. Weathered Barn Wood Chevron Triptych

Dividing a single continuous chevron or diamond design across three separate framed panels (a triptych) creates a gallery-grade focal point over large sofas or dining tables. Old barn oak or weather-beaten cedar gives each panel individual character.
9. Sunburst Wall Plaque
By cutting thin wedges or tapered strips from reclaimed fence pickets and arranging them radially around a central point, you create a rustic sunburst plaque. Sanding the tips down to fresh wood while keeping the outer edges weathered adds an attractive natural gradient.
Nature-Inspired & Organic Wood Art Ideas
For spaces that lean Boho, Scandinavian, or biophilic, natural wood shapes offer a peaceful connection to outdoors.
10. Live-Edge River & Resin Slab Panel

Combining two book-matched live-edge wood slabs with a clear or tinted epoxy resin channel in the center forms a river wall art panel. The raw bark edge showcases the tree’s original growth lines, while polished resin adds a clean, smooth contrast.
11. Organic Wood Slice Mosaic Wall Hanging
Cross-cut tree branches or trunk logs (wood cookies) display natural growth rings. Grouping slices of varying diameters on a dark-stained backing board forms a organic pattern that works exceptionally well in entryways and cozy corners.
12. Driftwood & Branch Mobile Displays
Smooth, water-worn driftwood pieces gathered from coastlines or riverbeds can be connected using natural jute rope or suspended inside a hollow hardwood frame. This adds lightweight visual movement without heavy construction requirements.
Fine Woodworking & Intricate Art Ideas
For makers looking to test their precision cutting and detailing skills, these advanced concepts yield heirloom-quality results.
13. Scroll Saw Botanical Fretwork

Using thin 1/4-inch Baltic birch plywood, a scroll saw allows you to cut intricate lace-like patterns such as monstera leaves, forest canopies, or geometric mandalas. Mounting the delicate fretwork 1/2-inch off the wall creates soft background shadows.
14. Pyrography (Wood-Burned) Art Panels
Pyrography uses a heated pen tool to burn detailed line art directly into pale, fine-grained woods like basswood, maple, or birch. Burning botanical studies or detailed maps creates permanent brown and black shading preserved under clear lacquer.
15. Hand-Carved Relief Wall Plaque
Carving low-relief patterns into soft hardwoods like basswood or butternut brings depth through gouge marks and chisel textures. Hand-carved panels hold light beautifully and showcase authentic artisan craftsmanship.
Step-by-Step: How to Build a DIY Geometric Wood Wall Art Panel

If you are ready to construct your first wooden wall panel, follow this reliable, workshop-tested assembly process.
Measure the Space & Select Materials
Adhere to spatial proportion rules
Choose a wall space and decide on the panel dimensions. For artwork mounted above a couch or headboard, aim for a width that spans roughly two-thirds of the furniture below it. Select 1/2-inch birch plywood for the backer panel, and standard 1×2 pine or cedar boards for the decorative front pattern.
Mark the Center & Cut the Backer Board
Cut your backing plywood to size using a circular saw or table saw. Measure diagonally corner-to-corner to mark the exact center point. Drawing vertical and horizontal layout axes from this center mark gives you a reliable reference grid for aligning pattern pieces.
Batch-Cut Pattern Pieces & Dry Fit
Set your miter saw to 45 degrees (or your chosen pattern angle). Use a stop block attached to your saw fence to ensure every slat piece is cut to identical lengths. Lay all pieces out on the backer board without glue to test the pattern fit and make minor adjustments.
Sand, Stain, and Paint Individual Components
Sand all timber slats smoothly with 150-grit sandpaper, finishing with 220-grit. Apply your chosen wood stains or acrylic paints to individual pieces before final assembly. Pre-finishing prevents stain from bleeding into adjacent wood pieces or glued joints.
Glue & Nail Pieces to the Backing Board
Apply PVA wood glue (such as Titebond II) to the back of each piece. Set the pieces along your layout lines, using 1/4-inch wood scraps as uniform spacers if your design includes gaps. Secure each strip from the front using a brad nailer with 1-inch brad nails.
Add a Perimeter Frame & Attach Mounting Hardware
Miter four 1×2 or 2×2 side strips at 45-degree angles to create a clean perimeter frame around the panel edge. Fasten the frame with glue and finish nails. Finally, mount heavy-duty French cleats or heavy-duty D-rings to the back of the backer panel.
Essential Wood Working & Finishing Tips

- Use Board Spacers for Fast Layouts: Instead of measuring individual gaps between wood slats, cut small offcut blocks to your desired gap width (e.g., 1/4 inch or 1/2 inch). Slide these spacer blocks between slats during glue-up to maintain perfectly uniform spacing across the entire board.
- Pre-Condition Porous Woods: Softwoods like pine and cedar absorb stain unevenly, which can cause blotchy patches. Applying a pre-stain wood conditioner ensures smooth, even color absorption across all pattern pieces.
- Control Assembly Weight: Solid hardwood quickly becomes extremely heavy when built into large art installations. Use lightweight 1/2-inch exterior or cabinet-grade plywood for backer panels, and reserve heavy hardwoods for accent focal points. [Plywood Grades Explained]
- Secure Heavy Artwork Safely: Never rely on simple drywall anchors for heavy 3D wood assemblies. Always anchor mounting hardware directly into wall studs, or use a interlocking wood French cleat system capable of distributing weight evenly across multiple wall studs.
Frequently Asked Questions
What is the best wood for making DIY wall art?
For beginners, white pine, cedar, and Baltic birch plywood are ideal because they are lightweight, affordable, easy to cut, and accept stains consistently. Advanced makers often use hardwoods like black walnut, white oak, and cherry for richer natural color contrast.
How do I hang heavy wood wall art safely?
The safest method for hanging heavy wooden wall panels is a French cleat system. One bevel-cut wooden bracket attaches to the back of the art, while a matching bracket is screwed directly into wall studs. The interlocking 45-degree angle holds heavy loads securely against the wall.
Can I make wood wall art with basic hand tools?
Yes. While power tools like miter saws and brad nailers speed up production, you can build geometric wood art using a standard hand miter box, a handsaw, wood glue, and a finishing hammer with small brad nails.
How do I prevent wood wall art from warping over time?
To prevent warping, ensure your lumber is fully acclimated and dried (ideally 6% to 8% moisture content) before assembly. Seal both the front and back of the finished art piece with polyurethane or lacquer to prevent moisture absorption from changing room humidity.
What finish is best for accentuating natural wood grain?
A rubbed oil-wax finish (such as hardwax oil or Danish oil) enhances natural wood grain without adding a plastic-like shine. If you need higher protection or plan to hang the art in high-humidity areas like bathrooms, use a satin polyurethane coat.
How do I choose the right size wall art for my wall?
Get Instant Access To 16,000 Woodworking Plans!


Leave a Reply